Setting Up Arrival Times and Additional Label Values from a CSV File
This feature reads the exact times Work Items should be generated at a Start Point from a CSV file. It can also assign label values to the Work Items. The CSV file can be generated by saving an Excel worksheet in this format.
1. Excel Spreadsheet Set-Up
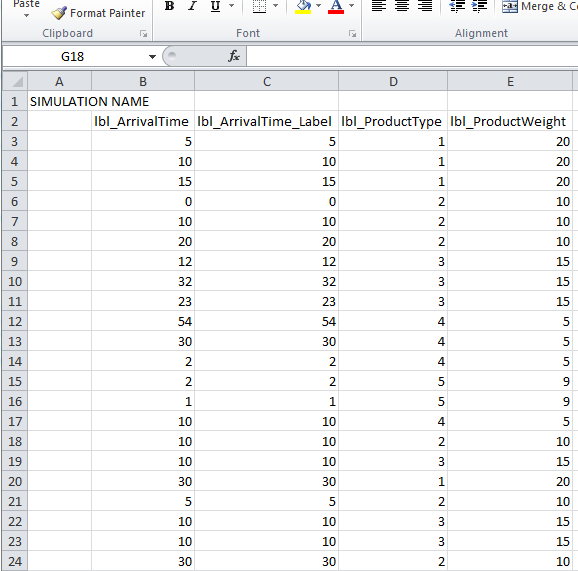
This feature requires the CSV file to be formatted in the following way:
- Each row corresponds to a Work Item.
- Data must start on the 3rd row. The first cell in row 1 and 2 must be populated – row 1 could contain the simulation name, and row 2 the label names.
- The time the Work Item enters the simulation must be in the 2nd column. The work items will enter the simulation in the order of top to bottom in the spreadsheet, and the arrival time sets the rate at which they arrive.
- Label values (if required) are contained in columns 3 and onwards. Row 2 must contain the label title exactly as defined in SIMUL8.
The CSV file must be closed before running the simulation.
2. Labels in SIMUL8
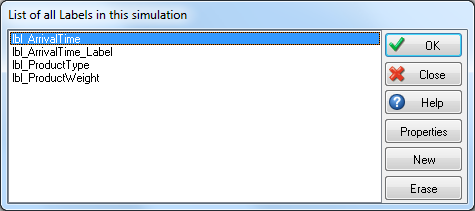
You must create labels within SIMUL8 that are identical to your label headers in your spreadsheet. Note that these labels were created to correspond with the label name headers in the Excel CSV File.
3. Attaching the CSV File
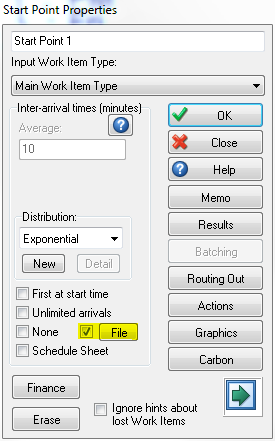
Once the CSV file and the corresponding labels are created, the CSV file will need to be linked to the Start Point. To do this, double-click on the Start Point and the above menu will appear. Select the “File” option, and then select the CSV file. It is now linked to the Start Point.
4. Running the Simulation
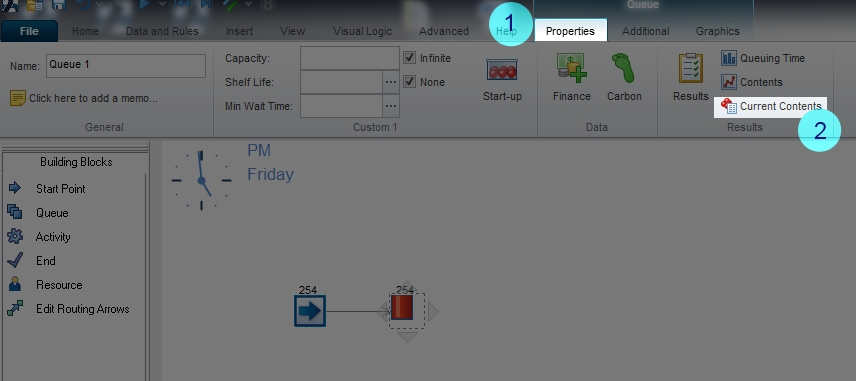
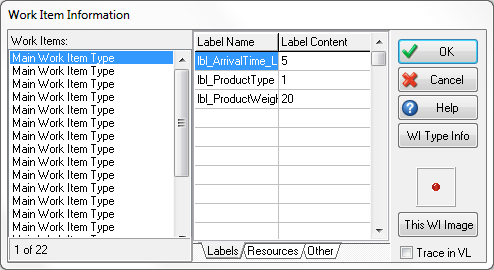
When the simulation has run, you will be able to verify that the CSV file was working correctly by selecting a queue, navigating to the Properties tab, and then viewing the Contents by selecting Current Contents. Below, we can see that all of the Arrival Times and Label Values have been automatically allocated to our Work Items by using the external CSV file!
