New way to add and customize buttons
SIMUL8 has always offered our power users the ability to add onscreen buttons, but now we’ve made it even faster to add these hugely useful features to your simulation. A wizard will guide you through the steps to create buttons using standard graphics for the most common actions our customers have told us about.
Use them when you’re building simulations to access the spreadsheets you use most often, or when you are sharing your simulation with others to guide them to the variables you want them to adjust.
How to do it:
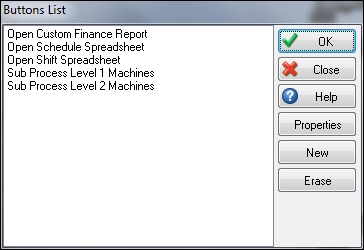
Navigate to the Insert Tab and select Button. This will open the Buttons List dialog.

Now you can create, delete, manage, and edit custom buttons in your simulation. Buttons are a useful tool because, once set up, they will allow you to perform actions within your simulation with only a click. This is also useful to demonstrate simulations to end users, as they may not have experience with SIMUL8, and buttons can make a simulation extremely user-friendly to someone unfamiliar with the software.
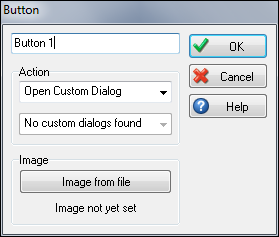
Next you need to set up your Button Properties.

Actions are the functions that buttons are commonly used for and can be easily set up with the Customizable Button feature. For Custom Dialogs, Internal Spreadsheets, Custom Reports, and Sub Processes, that these must be created within your simulation before you can create a button.
Next, select an image from file to set the look of your button. There is no set restriction for the button size, but it is generally recommended that buttons are not large graphics. You can find some ready-made button graphics in the button folder in the SIMUL8 Image Library.
Once you have created a button, open the Buttons List dialog. Select the button you want to place, and click OK. Now click anywhere within your simulation window to place the button. You can click and drag the button to move it anywhere within your simulation. It’s that easy!