Welcome to our SIMUL8 2018 Feature Spotlight series where we’ll show you how to get started with the new features available in our latest release.
In our fifth spotlight feature, we’ll be showing you how to use the new time-saving Central Label Editor – a centralized interface for easily creating, editing and controlling Labels.
When could you use the Central Label Editor?
As a popular feature with both new and experienced users, the number of ways that Labels can be used in SIMUL8 has continually expanded.
Labels are a way to attach attributes to any Work Items in your simulation. For example, you could attach a Label “Illness” to Work Item type “Patients” and set this Label to a code number as they enter your simulation of a hospital. Each code number would represent a type of illness and could be used to route the patients though the different Activities in the simulation.
As a single-window interface, the new Central Label Editor makes setting up, editing and tracking Labels so much faster. Frequent operations like creating a Label, attaching it to an Activity and setting it to control routing can all now be done in seconds.
This new feature will help you save more time on every simulation you build by instantly showing you where all of your Labels have been applied and enabling you to quickly edit them all from one central place. In fact, this feature is such a time-saver, it’s already saving our own consultants over 30 minutes per day (130 hours per year)!
How to use the Central Label Editor – an example
Let’s take a look at how to use the Central Label Editor using the airport check-in desk example simulation from our Route Out By Multiple Conditions feature blog post.
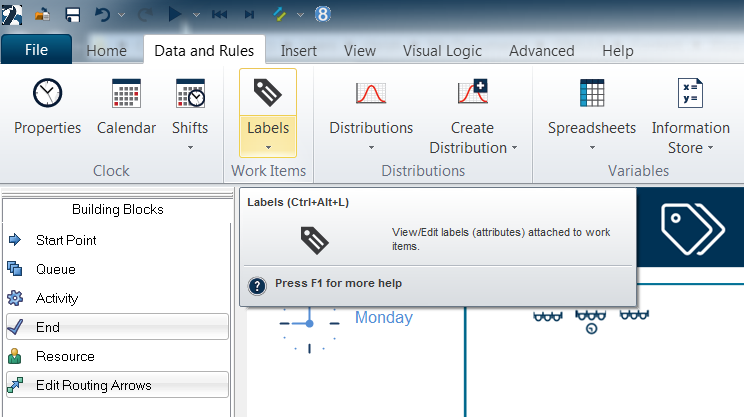
To access the Central Label Editor, click on the ‘Data and Rules’ tab and select the ‘Labels’ button.
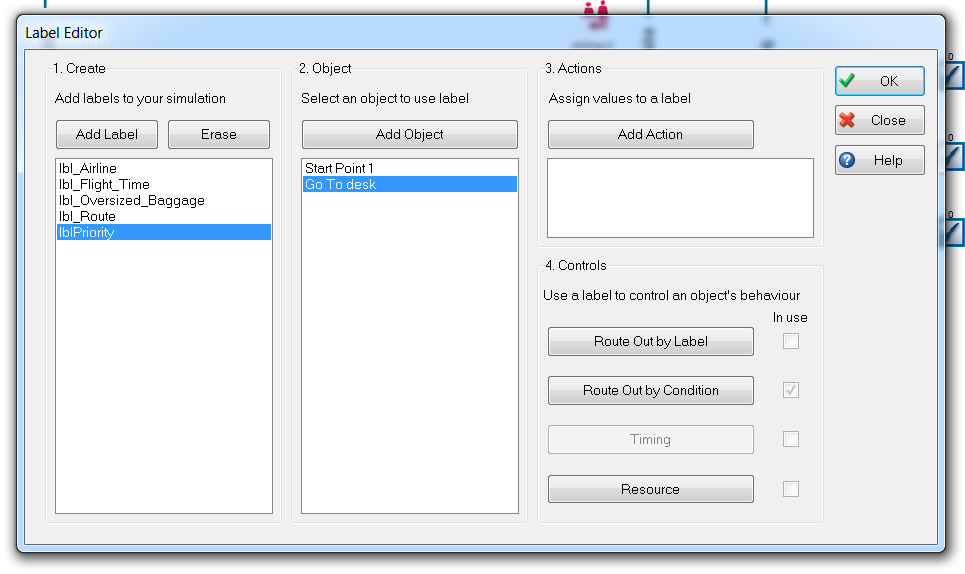
When you open the Central Label Editor you will be presented with the new interface containing four sections:
1. Create
2. Object
3. Actions
4. Controls
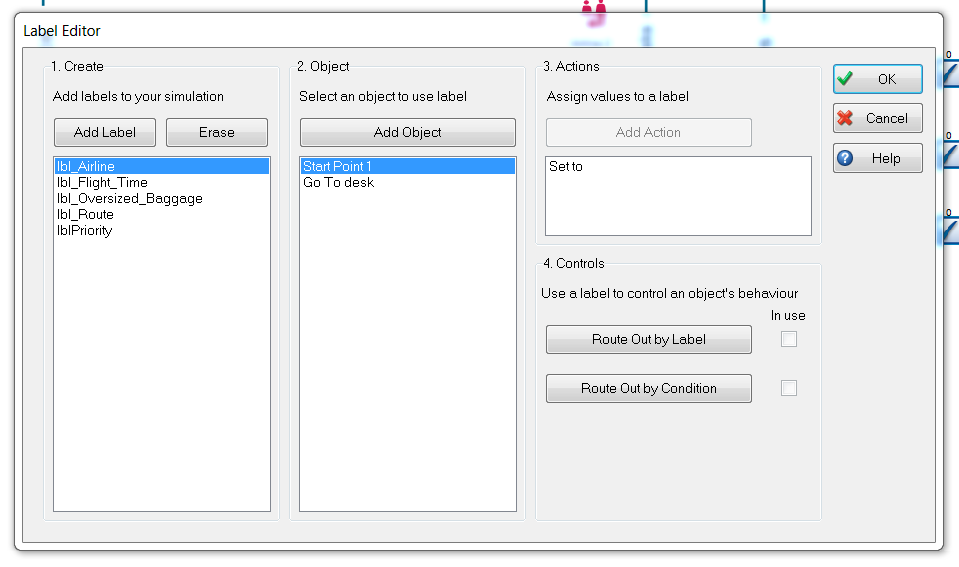
In the Create section you will see all the Labels that are already part of your simulation. You can double-click on any Label in the list to quickly change its properties. You can also create a new Label directly in this interface by selecting the Add Label button.
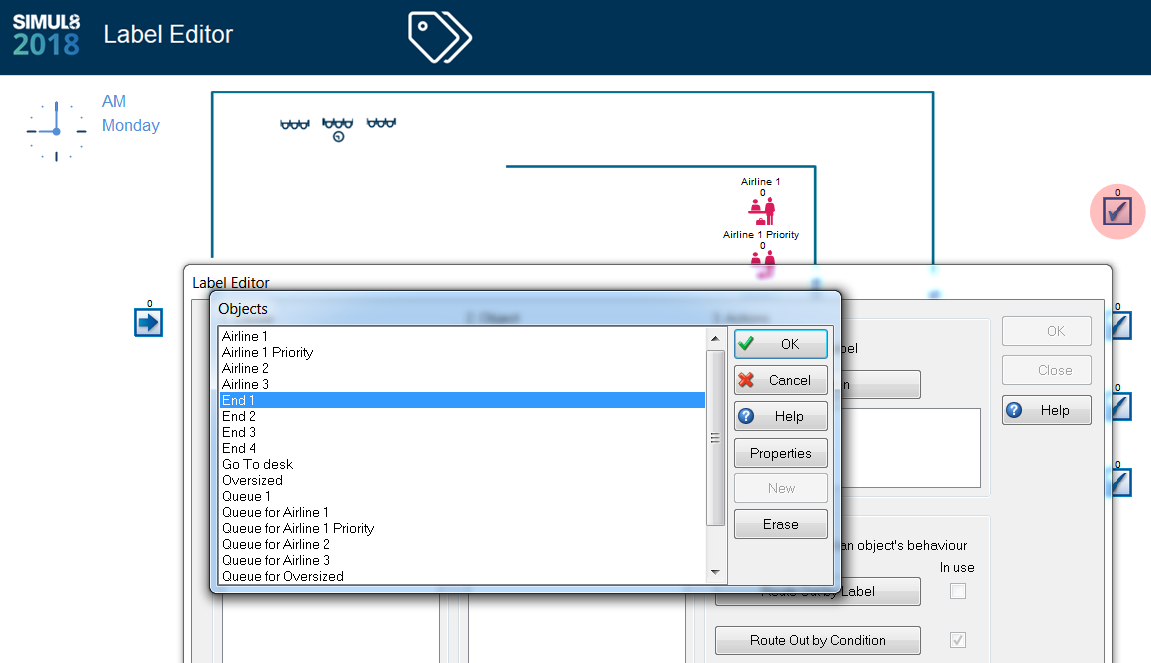
In the second column we can see the Objects associated with our Labels. If you have created a new Label, the ‘Add Object’ button will become enabled. Selecting ‘Add Object’ will open a dialog containing a list of all objects in the simulation. Select the object you wish to do something with and press ‘OK’.
In our airport check-in desk example, we can see that our Label named ‘lblPriority’ is already associated with two objects – the Start Point and Go To Desk.
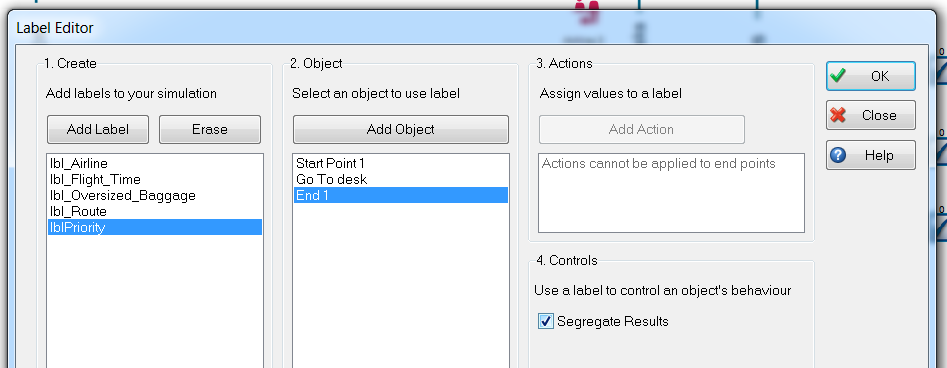
After adding an object you are now able to add an Action, which allows you add a value to a Label which you can then use to control various parameters in a simulation.
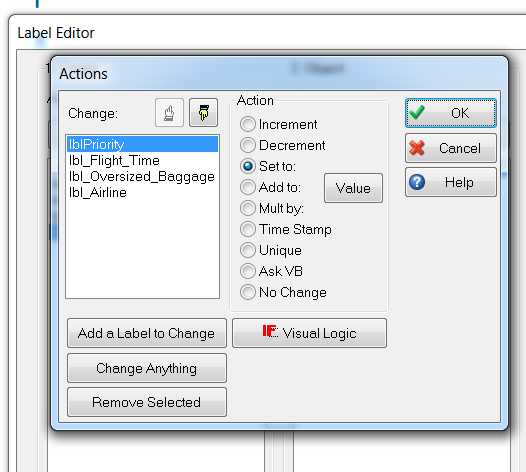
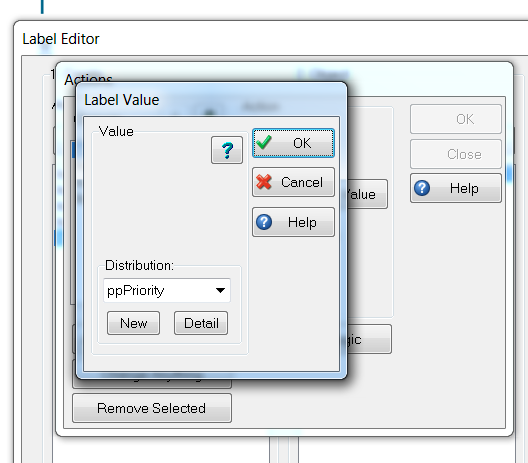
Clicking on our Start Point object, we can also see that in the Actions section the Start Point is setting the ‘lblPriority’ Label to something. If we double click on ‘Set to’, we can quickly what this is – in this case, using a probability profile distribution named ‘ppPriority’.
Clicking on our ‘Go To Desk’ object, you will see that this object is using the ‘Route Out by Condition’ under the Controls section, as we previously demonstrated in the Route Out By Multiple Conditions feature blog post.
To add a new control, select the relevant button or checkbox and the label highlighted under ‘Label’ section will be automatically added for use in the control.


Save time on every simulation you build
By instantly being able to see where all of your Labels have been applied and to be able to edit them from within one convenient place, the Central Label Editor will make Labels easier to use and help save valuable to time on every simulation you build.
If you’d like to find out more about the new features in SIMUL8 2018 then visit SIMUL8.com/2018, or get in touch, we’d love to hear your feedback.
Webinar: See SIMUL8 2018 in action
Take a closer look at all of SIMUL8 2018’s new and expanded features in our on-demand webinar.