SIMUL8 2018 feature spotlight: Route Out By Multiple Conditions
![]() Simul8 / Apr 20, 2018
Simul8 / Apr 20, 2018
Welcome to our SIMUL8 2018 Feature Spotlight series where we’ll show you how to get started with the new features available in our latest release.
In our fourth feature spotlight, we’re focusing on Route Out By Multiple Conditions which adds more power to the Route Out By Condition feature first introduced in our last SIMUL8 2017 service pack.
This powerful feature enables you to set conditions in your simulation where, if met, Work Items will be sent down that route. If your process rules require an ‘If’ statement to determine routing or even if you want to refer to a formula or multiple other label values to work out where Work Items should go, all of these options are possible without the need for Visual Logic or spreadsheets.
When could you use the Route Out By Multiple Conditions?
There are so many ways you could use this feature! For example, in a contact center which serves customers across multiple time zones, you might want to test sending work on a different routes depending on the time of day. With Route Out By Multiple Conditions you could also test changes to how work is routed depending on the current state of the system. For example, sending calls through to overflow centers depending on number of calls already queuing. You can even use a combination of conditions together, so depending on both the queue size and the time of day, calls could go through to different home-based call agents. The possibilities are endless!
That’s the beauty of this feature – it brings all the flexibility and power of Visual Logic in a quick and easy-to-use feature.
How to use Route Out By Multiple Conditions – an example
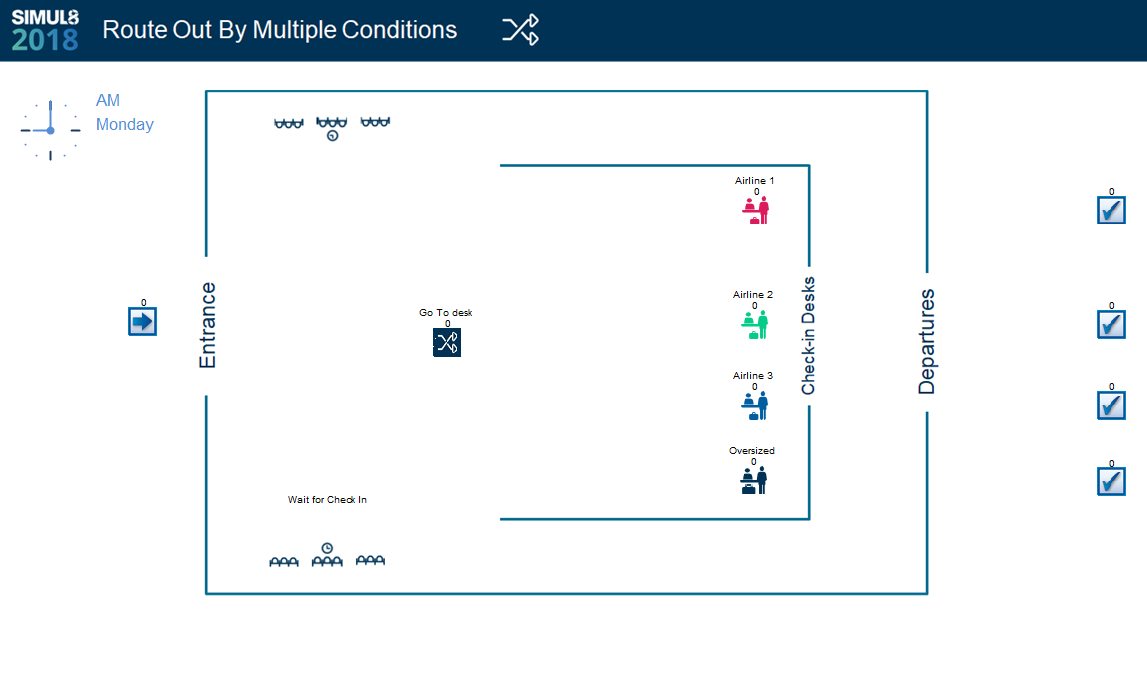
Let’s take a look at the Route Out By Multiple Condition feature in action using a simple example simulation we’ve created of an airport check-in process.
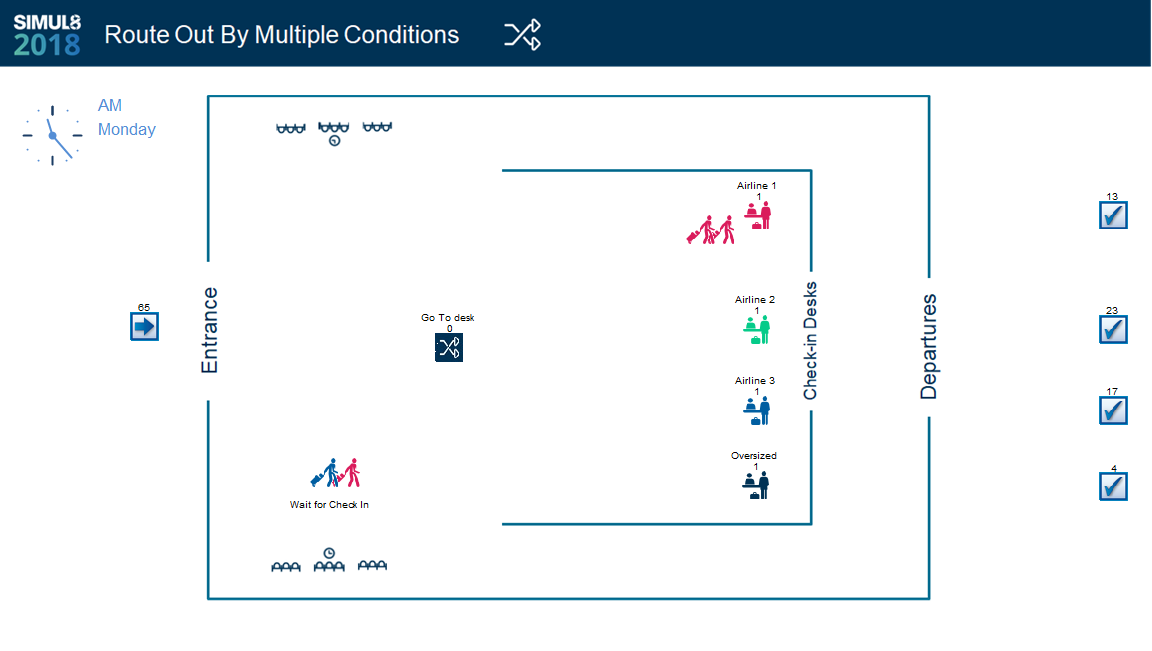
In this simulation, we want to move passengers to the relevant airline desk when it is time to check in and send any passengers who have oversized baggage directly to that kiosk.
In this set up there are a few conditions we need to incorporate. Where previously we would have utilized Visual Logic to achieve this, with SIMUL8 2018 this is now possible through a fast and simple to use interface.
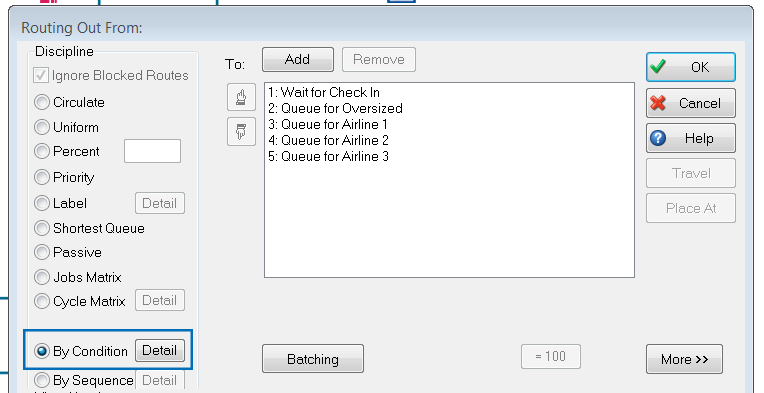
Selecting the Routing Out By Condition method
Let’s set up our routing by clicking on the ‘Go To Desk’ activity and selecting ‘Routing Out’ from the SIMUL8 ribbon. From the Discipline menu, select ‘By Condition’.
Setting the properties
In the Route Out By Condition properties, we can set a condition for each Destination that Work Items can be routed out to. For each condition we can use the ellipsis button to open the Formula Editor that will allow us to reference any property within the simulation in the conditional statement.
The Conditional Operators that we can use include:
- ‘CONTAINS’ is used to specify a list or range of values. Lists of values are separated with commas ‘,’ and ranges are signified with a dash ‘-‘. Using this method we can input multiple ranges as a list by separating the ranges with commas.
- ‘<’ Less Than
- ‘< =’ Less Than or Equal To
- ‘=’ Equal To
- “> =” Greater Than or Equal To
- “>” Greater Than
- “<>” Not Equal To
The Destination column displays the simulation objects that are linked after routing out. In our check-in example these include the airline desks, the oversized baggage kiosk and a waiting area if the passenger is too early to check in.
The Work Items (our airline passengers) will take the route for the first statement that is met. The order of these statements is controlled from the Routing Out From dialog by reordering the routes using the up and down pointing hand icons.
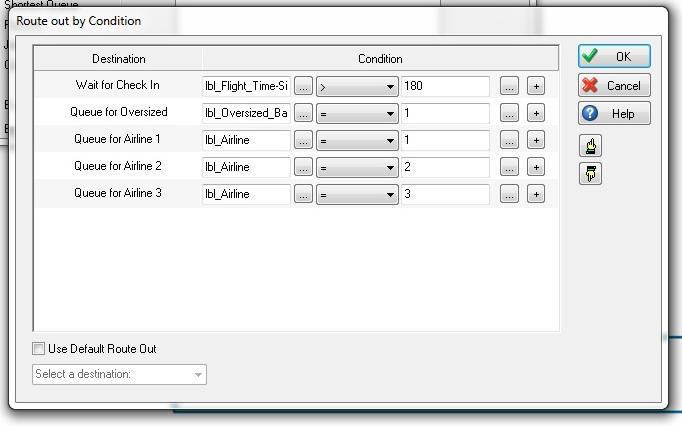
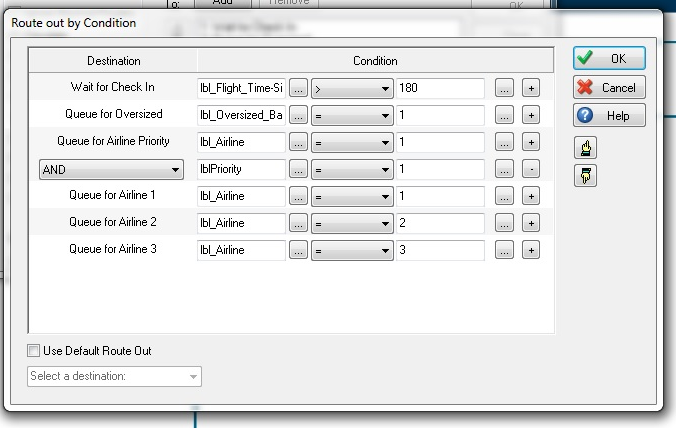
In the screenshot above, we can see the statements we have set up to check for in our airport example:
- Ensuring the passengers are ready to check in to their flight by checking the flight time is within three hours. To do this we are using a Label that holds the passengers’ flight time and we subtract this from the current simulation time. In this statement we are checking to see if this time is greater than 180 minutes – if so, those passengers will be sent back to our ‘wait for check-in’ area until their check in time is less than three hours away.
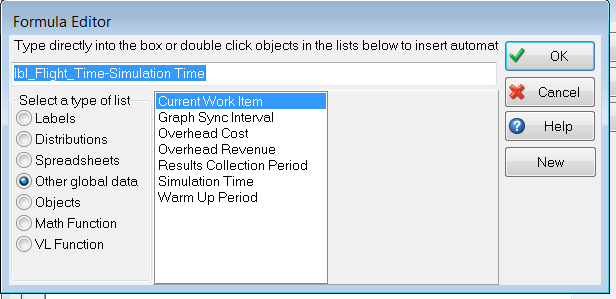
- We then want to check to see if the passenger has oversized baggage. Again, we are using a Label to do this – where the Label with oversized baggage is set to 1, these passengers will be routed to the oversized baggage check-in desk.
- The final three conditions are checking which airline desk the passengers should go to.
When we click OK, reset and run our simulation, we can see that anyone who is not ready to check in is going to our waiting area, the correct passengers are going to the right airline desk, and that anyone with oversized baggage is going to the oversized desk to check in.
Adding multiple conditions
Now, let’s take a look at how we could add multiple conditions to this simulation. First, we’ll duplicate our Airline 1 Activity using SIMUL8’s Duplication Wizard and rename this to ‘Airline Priority’.
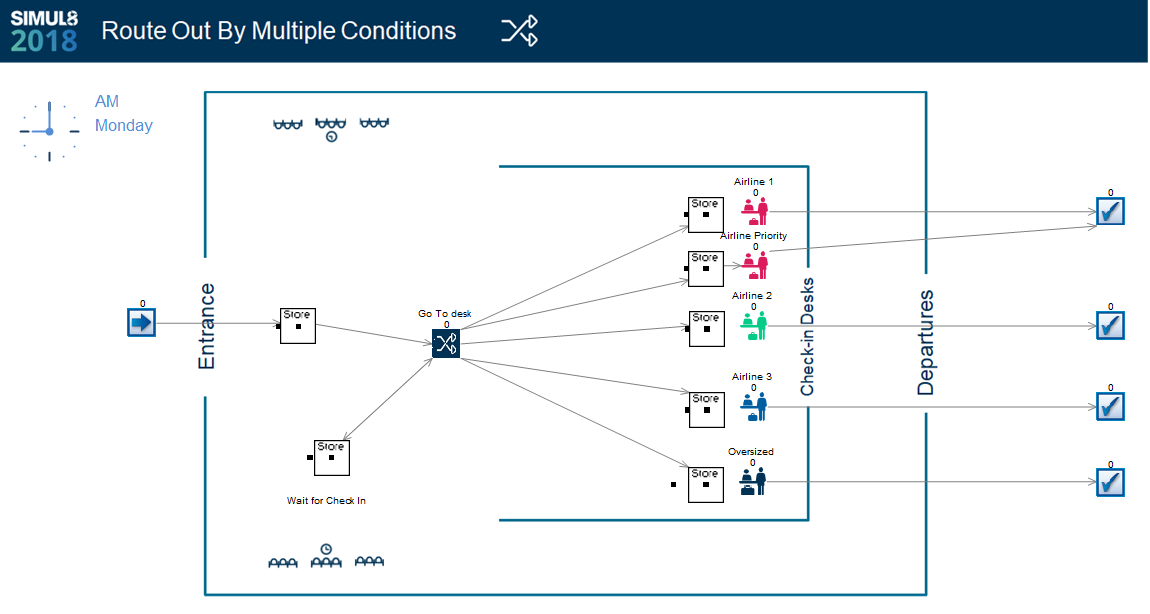
By selecting ‘Go To Desk’, we’ll then go back to our Routing Out menu and select By Condition again. Now, we want to set up a condition where our priority passengers for Airline 1 will go to the Airline Priority desk.
To add the condition, we select the ‘+’ button next to the ‘Queue for Airline Priority’ where we can then add further AND/OR conditional statements. In this case, we want to use the AND statement and checking that the Label ‘lblPriority’ is also equal to 1.
We then highlight the ‘Queue for Airline Priority’ and use the hand arrow icons to move the statement up to underneath where we are checking for oversized baggage.
After resetting and running the simulation through, our priority passengers are now routed to the priority desk and every other part of the simulation behaves as it did before. So you can see that Route Out By Multiple Conditions really is a powerful feature but with a very simple an fast set up time!
Bringing more power and flexibility to your simulation
Route Out by Multiple Conditions is a great addition to the existing routing options and will give you more control to accurately simulate your processes in less clicks, code and build time.
If you’d like to find out more about the new features in SIMUL8 2018 then visit SIMUL8.com/2018, or get in touch, we’d love to hear your feedback.
Webinar: See SIMUL8 2018 in action
Take a closer look at all of SIMUL8 2018’s new and expanded features in our on-demand webinar.