SIMUL8 2018 feature spotlight: Arrival Planner
Welcome to our SIMUL8 2018 Feature Spotlight series where we’ll show you how to get started with the new features available in our latest release.
In our third spotlight feature, we’re taking a closer look at the Arrival Planner, an upgrade to SIMUL8’s Day Planner feature which allows you to define the number of work items to enter the process within a specific time frame.
So how has the feature been improved in SIMUL8 2018? The Arrival Planner is no longer limited to only minutes and hours, allowing you to set arrival volumes for days, weeks or months in one simple interface – without the need to use any code in your simulation!
When could you use the Arrival Planner?
The Arrival Planner will help you to reach solutions even faster by exploring your process behavior through a single day, to across months or even years so you can quickly identify things like the impact of seasonal variation. Typical analysis tasks like comparing a low volume week against your busiest week or testing best-case and worst-case capacity planning over a whole year is now much easier.
An example of where this feature will be useful is for healthcare or hospital environments where we typically see high variation in patient arrivals for different departments. In our recent webinar with Memorial Health System they discussed a project where simulation was used to identify how best to centralize different testing areas at a critical-access hospital.
One issue the team uncovered during the process is that some of the procedure areas in this hospital had less frequent arrival patterns which they found difficult to simulate. Whereas the Memorial Health team utilized Visual Logic to take these patients that might only arrive once or twice a week into account in their simulation, the Arrival Planner’s improved functionality allows you to more easily capture those types of arrival volumes without any code.
How to use the Arrival Planner – an example
Let’s take a look at how we can use the Arrival Planner using a simple four-click example simulation.

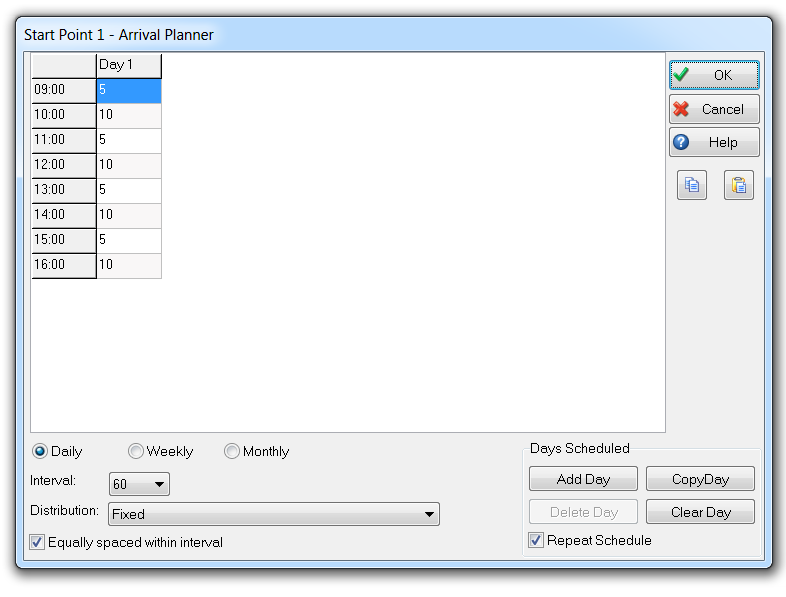
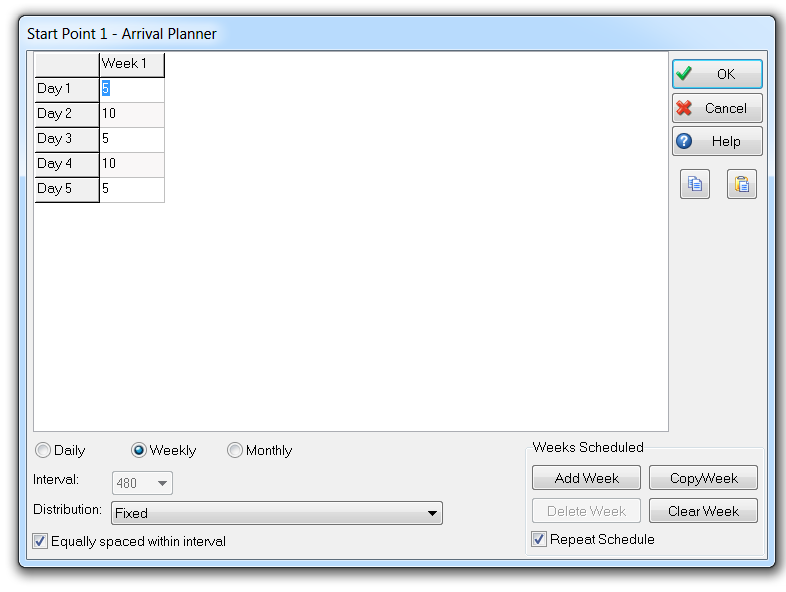
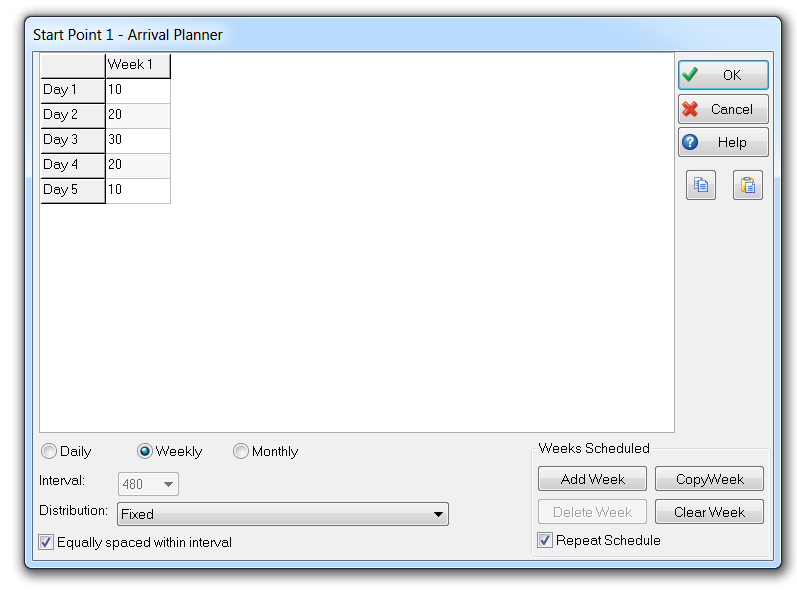
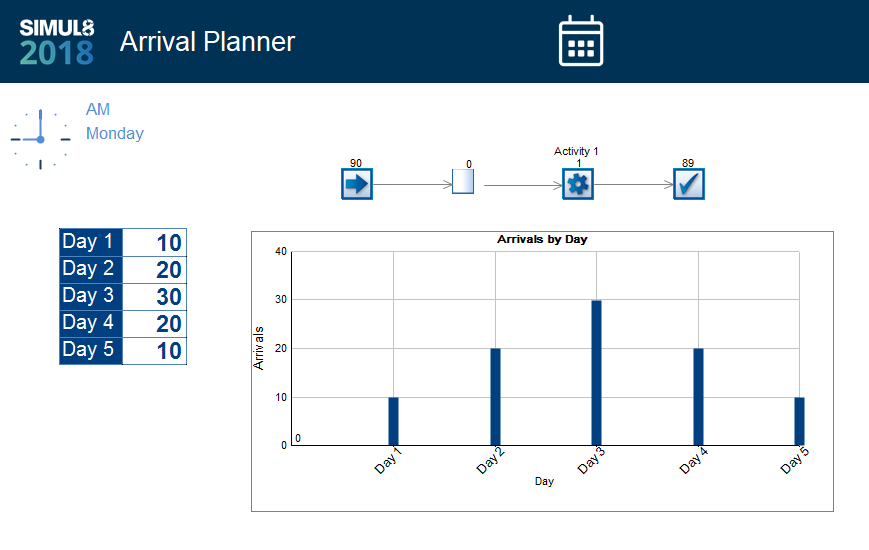
In this example, we have set 10 arrivals on Day 1, 20 on Day 2, 30 on Day 3, 20 on Day 4 and 10 on Day 5. As we have set a Fixed Distribution, we should see those exact numbers running through our simulation. You can also set these to either ‘Random’ or ‘Other’ distribution options from the drop-down menu. If you wish to use the ‘Other’ option you need to define what distribution you want on the Start Point.
Here, we have also selected the ‘Equally spaced within interval’ checkbox option to ensure that the arrivals at each interval are split equally over that time.
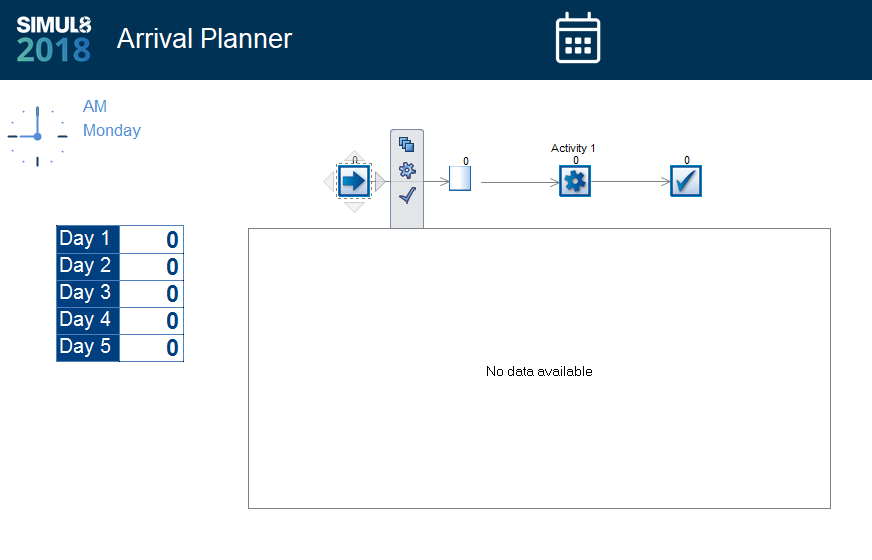
If we select OK and go back to our simulation, when we reset and run it through we can see by both the table and chart results that each of our arrivals set in the Arrival Planner menu have gone through the simulation as expected.
A simple but powerful way to control arrivals
As you can see from this simple example simulation, the Arrival Planner provides SIMUL8 users with a very fast and intuitive way to control arrivals into simulations by varying time periods.
If you’d like to find out more about the new features in SIMUL8 2018 then visit SIMUL8.com/2018, or get in touch, we’d love to hear your feedback.
Webinar: See SIMUL8 2018 in action
Take a closer look at all of SIMUL8 2018’s new and expanded features in our on-demand webinar.