A user-friendly, efficient and fast way to set the time, quantity and Labels of Work Items entering your simulation.
Determining the frequency that new Work Items enter your process is one of the most important aspects of your simulation.
Often this is done by setting up a distribution for the inter-arrival time. However, in some cases, your arrivals will follow a specific schedule. This is where SIMUL8’s Start Point Schedule is recommended. The Start Point Schedule allows you to generate simulation arrivals at an exact time. This is useful for when arrivals don’t follow a simple timing pattern, or arrive on specific days.
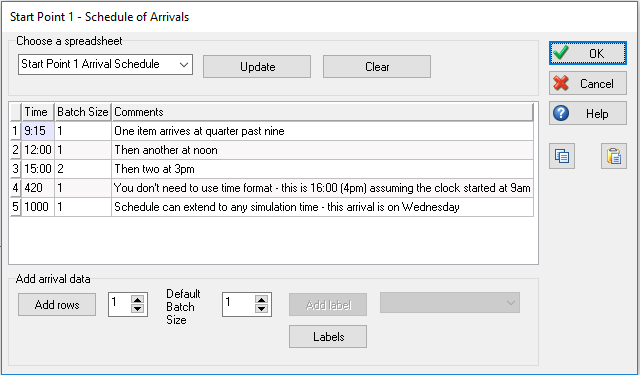
To access the Start Point Schedule, double-click on the Start Point to enter the properties dialog and activate the checkbox called Schedule. The dialog below will open. The Start Point Schedule is linked to an internal spreadsheet, meaning that it can be easily updated as long as the data is in the correct format:
Column 1: Arrival Time
Column 2: Number of Arrivals
You can have the time set as HH:MM (24hr format) and simulation time format as shown in the image below. The former allows the use of the same arrival schedule each day by typing “REPEAT” into last row of the first column. The latter, we would suggest for complete accuracy.
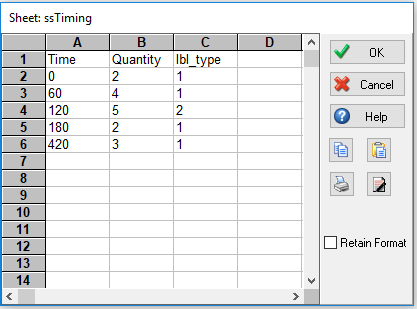
We can also use the Start Point Schedule to set Labels for our arrivals. In your internal spreadsheet, Column 3 onwards can be used for any Label values. You can add as many Labels as you like using a new column for each one but remember to create each Label before referencing it in your spreadsheet.
Let’s look at a simple example. Say you work in a factory where there are two types of containers that get set with the Label, “lbl_type,” that either get painted red (lbl_type = 1) or blue (lbl_type = 2). Your working day begins at 9 A.M. and runs for 8 hours. Your schedule is shown in the screenshot below, with 0 being 9 P.M. and 420 being 4 P.M.
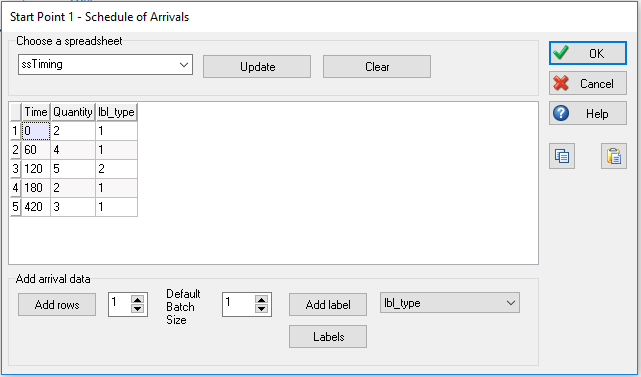
We can make this the internal spreadsheet that the Start Point Schedule references by choosing ‘ssTiming’ in the ‘Choose a spreadsheet’ dropdown menu. Click ‘Update’ and you can now see that our Times, Quantity and Label: ‘lbl_type’ have been added into the Start Point Schedule. Let’s Reset and Run the simulation and see if it has worked as expected.
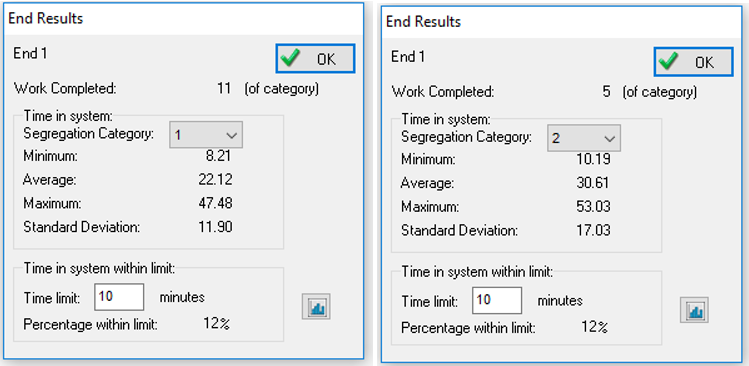
When looking at the End Results of the simulation, there were 11 Work Items with an ‘lbl_type’ of 1 and 5 Work Items with an ‘lbl_type’ of 2. This matches the parameters that were set in our Start Point Schedule and shows that this schedule was followed correctly.
The Start Point Schedule is a user-friendly, efficient and fast way to set the time, quantity and Labels of any and all Work Items entering your simulation.
We hope that you enjoyed this SIMUL8 tip and if you have any questions on how to use a feature, please get in touch with our support team who will be happy to help!